I have made it a mission of mine since a kid to help folks take better photos, and hope to do that for a while yet.. well, until I grow up at least.
The following are stories I've written over the years for an Aussie video camera magazine, and I thought I would share them here as the tips apply equally to video and stills.
As I made a transition from serious bum with a camera to getting paid, I dropped out of the competition scene, but helped the Parkes Club for many years with a monthly newsletter showcasing members work, and offering up tips.
How to photograph an Airshow.
It seems airshows and I go in common….Ive been photographing and filming them for the sheer pleasure of it since 1982.
The one big thing I have learnt – the hard way – is to travel light, have plenty of water on hand and a few litres of sunscreen nearby.
This may sound a strange way to start a story on ‘how to’, but airshows are in the main, held on hot days, with no shade, and you are in the middle of up to 70,000 other aviation enthusiasts, nowhere near amenities, usually metres from the runway.
With such crowd numbers, the prime spot, assuming you didn’t go Gold Class is simple. Its centre stage, right on the runway fence. This means you are going to be in the one spot for several hours; hence the need for sunsmart gear, travel light and water to hand.
The big thing to remember is that you will need to be able to have your eye to the camera at all times, especially when the aircraft go past down the runway at just under the speed of sound.
Doing stills? NO tripod.
SO, this means you will need to be able to pivot 180 degrees from full right to full left in less than three seconds, with the camera to your face and not giving your airshow neighbours concussion.
Some elements of the air display will be directly overhead to ground level in seconds as well.
This means that a tripod will be of little use to you if you are shooting stills.
In the crowd.
Or in the gold class
So. leave the tripod at home.
use the camera handheld
A high shutter speed will freeze the prop of most aircraft, other than a Harvard (Because the propeller tips are moving faster then sound) so if you want a great pic that gives the impression of speed, you will need to have the props blurred, but the aircraft crisp.
This is where you will need to work with a slower shutter than you normally would.
For sport action, say at the footy on a sunny day, 1/1000 sec at f8 using 400 ASA (or ISO) would freeze most action. The same shutter speed would also freeze most props.
If you worked at a really slow shutter speed, say 1/30 sec, the prop would be well blurred, but there would be no guarantee the rest of the aircraft would be crisp. So a careful compromise needs to be saught.. try working at 1/500 to 1/640 second.
if you have a tele lens with vibration reduction, then you will have a greater chance of nailing the pic at lower shutter speeds, especially when panning.
When it comes to the fast jets however, a shutter of 1/1000 is a positive asset in freezing the aircraft.
The big advantage when working with a slower shutter is the aperture is further stopped down, so the depth of field increases, which means the focus error you may have is less..
You feel the need to stay in the one spot, lest someone else steal your prime position.
I did one Avalon Airshow from the fence, and stood in the one sport for the entire 8 hour airshow. Needless to say I took the forementioned goodies and just survived. Even managing to ‘hold on’ for the duration.
If you don’t care about the runway shots, with the aircraft on takeoff, landing gear cycling, then you can set yourself up further back from the fence crowds and relax in a bit of space.
The advantage of this is that you will be able to spread out a bit, and take a folding chair with you and perhaps an umbrella (depending on the venue safety rules and winds) and you can also feel the freedom to visit the local food stalls and toilets.
When it comes to equipment, you will need spare tapes or memory cards, batteries – enough to keep the camera switched on for six hours, as well as a cleaning kit, such as a lens brush,
You may feel the need to stay in the one spot, lest someone else steal your prime position.
I did one Avalon Airshow from the fence, and stood in the one sport for the entire 8 hour airshow. Needless to say I took the forementioned goodies and just survived. Even managing to ‘hold on’ for the duration.
If you don’t care about the runway shots, with the aircraft on takeoff, landing gear cycling, then you can set yourself up further back from the fence crowds and relax in a bit of space.
The advantage of this is that you will be able to spread out a bit, and take a folding chair with you and perhaps an umbrella (depending on the venue safety rules and winds) and you can also feel the freedom to visit the local food stalls and toilets.
When it comes to equipment, you will need spare tapes or memory cards, batteries – enough to keep the camera switched on for six hours, as well as a cleaning kit, such as a lens brush.
Shooting video? TAKE a Tripod.
I know most folks groan when we say you need to use a tripod, but having filmed and practiced with and without a tripod, I assure you that you will have better, more watchable vision if you use a tripod, and correctly.
If your video camera has a flip out screen, this is the one occasion I believe you really need it. The reason is simple… and to prove it, try this.
Mount the camera on a tripod, and have your eye to the viewfinder, then do a SMOOTH and steady pan from left to right through 180 degrees. Now try it again without tripping over your feet, and the tripod legs… The only real way is to use the flip screen and work with your face away from the camera, watching the screen.
If you have a pan handle on the tripod, remount it so it will not foul the tripod when you aim the camera almost overhead, especially if you are using a LANC or similar camera controller.
The big tip is to find a space at the airshow with a clear two metres around you (as if...) because as the aircraft do their display passes, you will need to move the camera 180 degrees and have your eye to the viewfinder.. or you wont see if the aircraft is in frame..
And keep the aircraft in the one section of the frame at all times and be smooth.
If you cant get a clears space to walk the camera around the 180 degrees, try going off the shoulder.
Head to the Aero Club
Now for the tricky part, pack up the gear and head to the local airport, and pop into the flying school, and have a chat with the Chief Flying Instructor (CFI) and tell him that you are practicing filming aircraft and getting ready for Avalon.
That way, you won’t get any nocturnal visits from ASIO's Ninjas, and you will make quite a few new friends at the aero club who will actually appreciate you being there, and may ask you to share your work with them- especially the aerobatic pilots.
Not only that, but you will get an idea of the Circuit the aircraft fly around the airport you are at, what plane is what, and where the aircraft will be in the sky depending on the winds prevailing. Where they operate ‘airside’, and how to be safe when working near aircraft.
Practice, and practice again
The next thing is to begin practicing with extreme telephoto on a video camera (hence the need for a rock stable camera platform called a tripod. Say it out loud; TRIPOD and make a promise that if you don’t use one, you will soon for your video work)
To give you an idea, extend your arm, with fingers out, and fold up your thumb and little finger; leaving three fingers outstretched.
This is the field of view you will need to practice with your camera. So, at the airport, work at the fence, and ensure you can frame the aircraft, and then KEEP it in frame all the time, in the same PART of the frame, especially on the takeoff roll, and as it goes past you.
It is not as easy as it looks. It takes a lot of practice. A LOT of practice. And, dare I say it again, this works best using a tripod for video.
A typical airshow routine takes ten to 11 minutes for each ‘act’, and will feature the aircraft taking off well before their routine starts, usually in-between another aircrafts show. So you will need to keep your wits about you and do some careful editing afterwards if you wish to retain continuity .
With a stills camera, the weight of the camera can see you getting really sore by the end of the day. My Nikon body with 400mm lens weighs around four kilos all up. Thats a big load to be holding up to your face and then pointing it around the sky for several hours.
Getting ready
Setting up the camera is a good idea as well. Leaving the camera on auto everything will guarantee you almost unusable vision.
The most important things to do are;
- Set the colour balance to daylight.
- Video; Switch off autofocus. Stills; Switch on AF
- Set the focus to infinity, and check the
- exposure beforehand if you can
Four simple things, but why?
Well, the answer is easy.
With the colour balance, it will want to correct the light temperature so that the end result will become a neutral grey. In other words, what will happen is your deep blue sky, will be misread and converted to an 18% grey sky.
Not exactly the deep blue that you had in reality.
Not exactly the deep blue that you had in reality.
With the autofocus, most AF systems will hunt for focus when they are pointed at the sky. The fact there is a plane buzzing in the viewfinder won’t register for a few seconds, then it will shift from close focus to infinity and lock. This means that you will lose valuable vision, and the moment it can’t retain focus lock, off it will go, and hunt from close focus to infinity giving you lots of unusable vision and precious little usable stuff.
If you have a focus restriction switch, use it.
Video AF is nowhere near as good as the Nikon or Canon Autofocus, which is designed to cope with fast moving aircraft.
If you have a focus restriction switch, use it.
Video AF is nowhere near as good as the Nikon or Canon Autofocus, which is designed to cope with fast moving aircraft.
To correct for this, manually set the video camera focus at infinity. After all, the plane is not exactly close to you… so its closer to, well, several hundred metres… which in photographic terms is, well… infinity.
And the exposure? Well, if any video camera is worth its salt, it will have an exposure guide in the viewfinder or flip screen called ZEBRA.
The zebra stripes and lines indicate the correct exposure on an object in the frame, and will remove the possibility of over, or more likely under exposure in the shot frames, especially when there is sunlight reflected off the airframe.
Not only that, but judging exposure, when the flip screen is in full sun, is an acquired art. For airshows, the flipscreen is used only for framing.
Sad to say, most small palm sized camcorders are not fitted with decent exposure calculating software, like their bigger shoulder mounted professional relatives.
With stills work, there are a couple of different things..
- Set the colour balance to daylight.
- Use matrix metering if your camera has it, or use centre weighted.
- Switch ON autofocus.
- Switch on Vibration reduction if you have it.
- Set shutter to 1/500 for propellor driven aircraft, and 1/1000 for the jets.
Framing
When filming the flying aircraft, you will quickly discover it is extremely difficult to maintain a tight framing on the plane. You will also discover that shooting wide is easier.
The trick is to be able to compromise, so you get the aircraft movements, yet have it wide enough to be easily kept in frame, but not so wide the plane becomes a dirt speck on the loungeroom television screen.
This is where practice is the key, and by starting now, less than 12 months to Avalon, you should be just about ready to capture some of the worlds most amazing aircraft performing almost un-natural aerobatic routines.
Roulette 12 inverted at the bottom of a barrel roll at the Point Cook Air Pageant in 2014

This was 1/1500 sec, f11 at 800ASA. My crit is the prop blades are too frozen. If I had gone for 1/500 a sec, it would have looked better. Nevertheless, this is one of my favourite piccies.

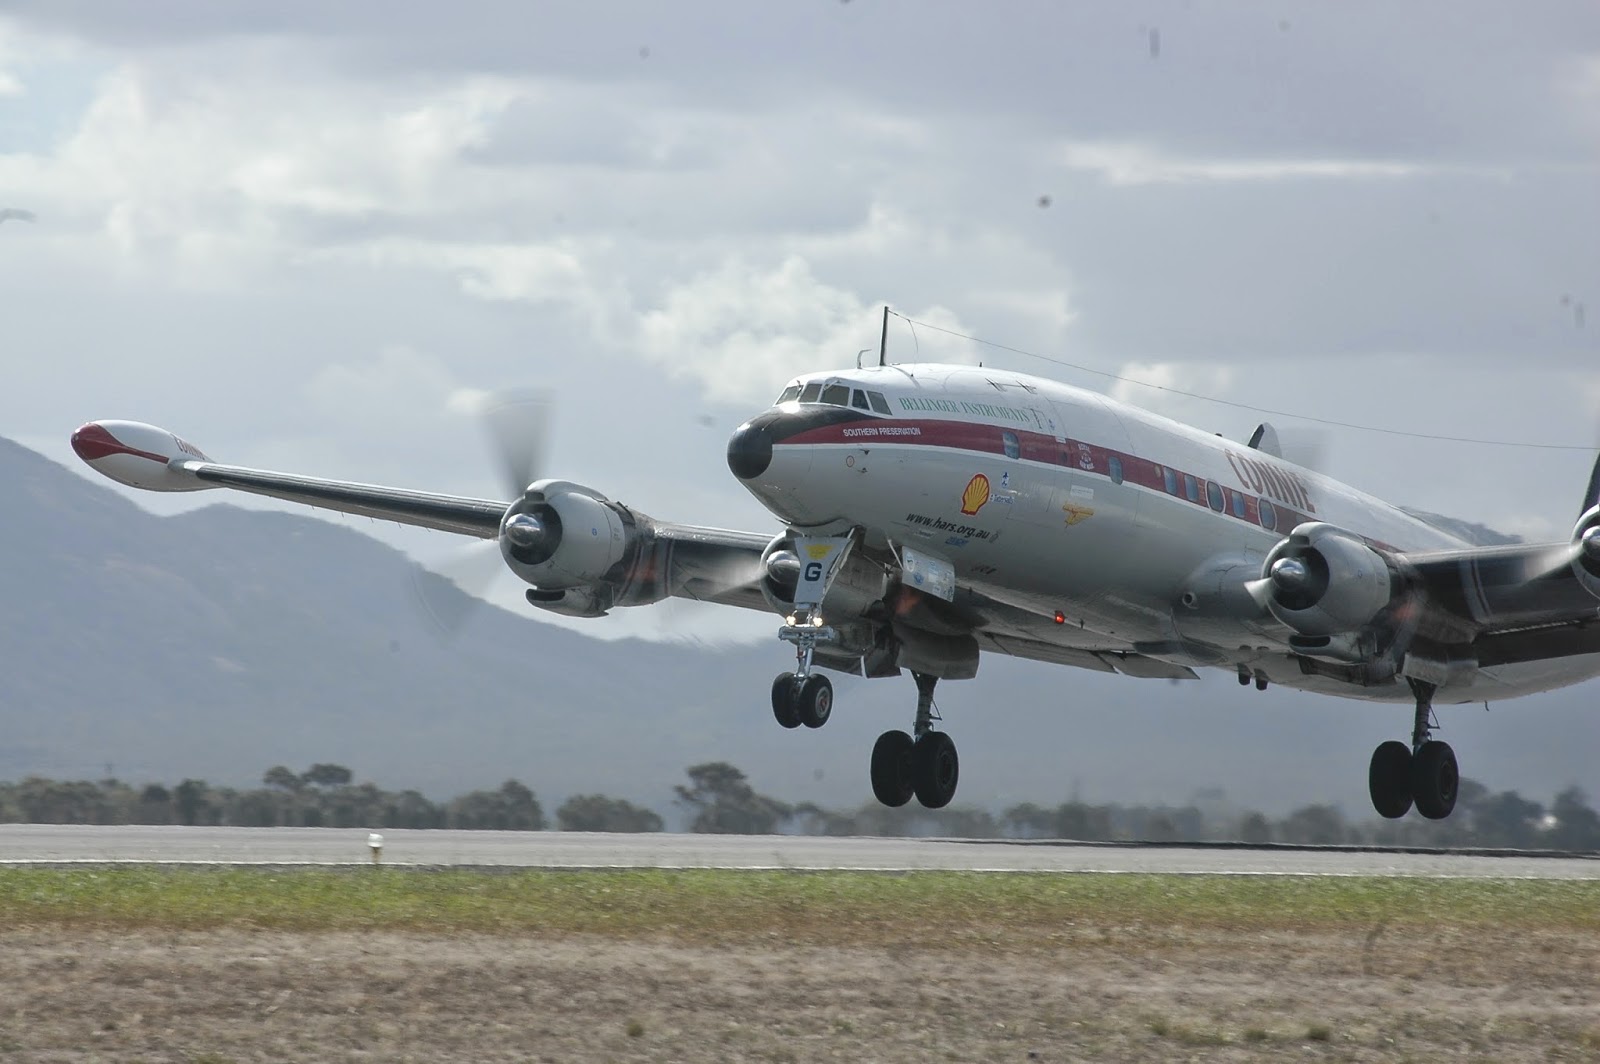
1/500 sec, f11 at 400ASA. The HARS Constellation at full throttle during takeoff at Avalon.
Notice the nice blur on the props...

The crowds at Avalon.. You can see the sheer number of people vying for prime position. Again, f11, 1/500 at 400ASA.

One of the two flying Spitfires in the country. This Mark 8 was built in 1944 and owned by the Temora Aviation Museum. This was shot during an Avalon appearance. Note the rudder being given a heavy right boot...
1/500 sec. f11 at 400ASA. the slower shutter allows prop blur, giving the impression of movement.
And a higher shutter for the jets...


Then again slow shutters can work with jets in this pic...... this F/A 18 Rhino operated by the US Navy Diamondbacks (Wild Weasles) was doing a Mach 0.9, low topside pass at Avalon in 2007.
This was shot using an old Nikon D70 (3fps motor drive, and 7Mp chip...) and an even older 80-200 f2.8 ED Nikkor lens... and guess what... f9 at 1/500 at 400ASA. Autofocus ON.

Alas no more F-111 dump and burns... this at Avalon with the D70 (made in 2005) and the 80-200 f2.8 at 200mm, f9, 1/1000 at 400ASA with matrix metering and autofocus.

Whacking the shutter down to 1/200 sec at f18 (400ASA) really blurred the props on this DC-3
And again, 1/200 sec (f18, 400ASA) rendered Connie's props a blur.

REJECT; This is from The Bin.. and the big reason is the props are frozen. No wonder, when the shutter is 1/1600 sec (f10, 400ASA)

Same aircraft, five min later... and with a shutter of 1/400 sec. If the props were frozen, the Hercules would look like a static display.


Just as rare; A Vampire on rotate at Point Cook. 1/1250 f11, 800ASA

A SAAB of Rex Airlines coming in at Tullamarine on Runway 18.... 400ASA 1/200 at f10. Uncropped with the 80-200.

Ectoplasm.. the FA-18 during a high speed manouvre with afterburners on.. f5.6 1/1250 80-200mm at 200mm (cropped)


This is with a shutter of 1/800 sec. Notice the prop blur?
One aircraft is frozen, because I was tracking that aircraft. The other is blurred because of subject movement. the apparent contact between the two is due to my superior photographic skills.... (which is bullshit pure and simple, because the universe was kind to me and gave me this shot).
The other aspect is this shot is almost directly overhead, as well as being panned left to right, with the aircraft doing 300 knots. This shot would be almost impossible with a tripod.

Get the drift?
Want a prop driven aircraft to look like its moving? use a slow shutter.
Photographing a jet? use a high shutter speed..
AF and Vibration reduction..? Switch ON.
Learning the flying stuff for non flying people.
All aircraft fly in and out of an airport according to a set pattern called The Circuit.
This is standard world wide, and is used primarily as an invisible roadway in the sky to avoid aircraft colliding with each other, as the sky is often congested.

Really simply described, it is a rectangle, with one of the long sides comprising the runway.
Once the Aircraft takes off at an airshow, it usually goes to an area away from the show, and holds there until called in for its performance. After it has finished, you will notice it heads away from the airport, and if the pilot intends to land, they will join the circuit on the downwind leg, usually close to the crosswind leg intersection (see pic above).
Once joined into the circuit, they will do pre landing checks, and the big clue is seeing the landing gear being lowered.
Once you see this, you can plan ahead for landing photos of that aircraft. Unfortunately, many AC have a short landing roll, and so you will only get suitable framing when they are at taxi speed, and destined to come off the runway.
But seeing the gear come down on the downwind leg is a pretty final confirmation the show is over for that plane. With military aircraft, there is a high liklihood they will just depart the area for 'home' when their part in the show is over.
If you are lucky to be allowed to film airside (that’s the technical name for being on the side of the fence where the planes outnumber people) then be safe. Buy yourself a fluro vest so all pilots and crew can see you.
Make sure you are situationally aware, and know where all the aircraft around you are, and what they are doing. Being airside is cool, but it is a bit more dangerous than behind the fence.A really useful tip, is never go near the prop on a parked aircraft, and treat every aircraft engine as live, and about to start.
If you see the red anti-collision beacon rotating on a parked aircraft, back off; as the pilot is about to do an engine start… which is really good advice to get the shots of startup, and the smoke cough with big radials.
SCANNER;
If you have a radio scanner, this will make things a bit more fun. You will be able to listen in -legally- to the radio traffic.
The radio frequencies are easily found by either asking a local pilot, or by looking them up on the web.
Head to www.airservicesaustralia.com/aip/aip.asp and head to the bottom and click agree, once you have read the fine print. then follow the prompts and links to the aiport of your choice.
------------------------------------------------------------------------------------------------------------------
We had a cleanout, and was about to place a rat infested and broken couch in the bin when I grabbed the camera and thought this scene was just too surreal. The scene is as the couch was when we just plonked it there..
Anyway, this is the unaltered pic...

And this is the one I deliberately went OTT with...
SCANNER;
If you have a radio scanner, this will make things a bit more fun. You will be able to listen in -legally- to the radio traffic.
The radio frequencies are easily found by either asking a local pilot, or by looking them up on the web.
Head to www.airservicesaustralia.com/aip/aip.asp and head to the bottom and click agree, once you have read the fine print. then follow the prompts and links to the aiport of your choice.
------------------------------------------------------------------------------------------------------------------
Over The Top Photoshop.
We had a cleanout, and was about to place a rat infested and broken couch in the bin when I grabbed the camera and thought this scene was just too surreal. The scene is as the couch was when we just plonked it there..
Anyway, this is the unaltered pic...
And this is the one I deliberately went OTT with...

As you can see, there is almost anything that can be done in Photoshop.. it all comes down to individual taste.
We see so many overprocessed photos that have been photoshopped to within a pixel of decency.
I also wonder how how they would go with shooting film, or even better - slide!
Many years ago, an out of focus portrait WON the Royal Society portraiture award.... remind me to enter this one at the next Whittlesea Show!
---------------------------------------------------------------------------------------------------------------------
How to photograph and film the kids footy
It’s THAT time of year… footy season is well and truly here and the Grand Finals are not that far off.
I'm going to give you a quick insight into getting the best from your video or stills camera.

Watching the kids take to the footy field is always a great experience. Recording it is even better, and best of all is making a special film of the game for the family to watch later on.
Not only that but with the more senior levels, coaches can use the vision to analyse opposition tactics, and even vindicate a player at the tribunal.
It does not matter what code of footy you are shooting, or the level of the players involved, as the basics are the same.
The main video camera accessory is always a tripod. The second one is a spare battery and the third is a spare tape. If the weather looks wet, then plan ahead and take a suitable camera rain cover. For stills photos use a solid built monopod such as a Manfrotto if the lens is heavy or over 200mm in focal length.
The next thing is video camera location. If at all possible work from the centerline with the sun behind you.
The reason for this is simple.. it will enable you to follow the play wherever the ball goes.
If you just want to film the most important player on the field – your kid, then the location is a bit simpler. Place yourself where he will be running towards camera.
For stills photos, the discipline is stronger. postion yourself so your team is running TOWARDS you.
In soccer work from the oppositions goal line. In League/Union, much the same and with AFL because the ground is so large, usually from the oppositions pocket line.
If you are able to get the video camera to a high viewpoint, even better, as this will ensure a good ‘read of the play’ for the viewer and be useful later on for game analysis.
The big things to remember include not getting in the way of the players or the referees/umpires, keep your own mouth closed so your comments stay off the tape, keep the camera on the tripod, always rolling, with one eye always to the viewfinder following the action and the other watching where the ball will land.
The only time you should stop tape is during a break in play, such as halftime or end of quarter.
This means that you will have to work and concentrate solidly for up to two hours on one game. Certainly an exercise in mental discipline. Now you have a whole new respect for the camera operators who work to capture the AFL, Soccer, Union or NRL games!
With the lens selection, ensure digital zoom is switched off. You may decide to use a teleconverter, but in practice this is only effective if you are after extreme close-ups of individual players.
Predictive action
Following the action is not for the easily distracted. Remember, you will have a ‘face to camera’ commitment of up to two hours, and you have to constantly follow the action and also predict where the action will be… for every minute of the game.
This is an acquired skill and depends on you being able to see the kick, and work out where the ball will land... and then SMOOTHLY pan the camera to that point.
This means for video work, no chatter, no drinks, no chips… no mates around and your face must be glued to the screen for the entire time. Also be aware that everything said WILL be recorded, even your inane comments on the play!
In league with its characteristic ‘chain passing’ things become easier. With Rugby Union it’s sort of halfway between AFL and League in predictive framing.
Camera discipline
The dicipline does not end there either, as you are unable to do whip pans and crash zooms. Everything must be done smoothly. Its easy to sit on the couch watching the footy, but it certainly is a different story when you are behind the camera!
The dicipline does not end there either, as you are unable to do whip pans and crash zooms. Everything must be done smoothly. Its easy to sit on the couch watching the footy, but it certainly is a different story when you are behind the camera!
Once the action is ‘in the can’ the great thing is that you now have the ability to take a note from the networks and do your own slow motion replays, transitions, scores and the like in post production.
Once completed, the kids will love it – and always remember how you filmed their footy matches for them.
Working on the sideline shooting stills is a different kettle of fish altogether from the safe sheltered and comfortable centreline postion (preferably elevated) for video.
The general rule of thumb is to make sure your team will be running TOWARDS you. After all, the backs of kids heads are not that inspiring.
AFL
With AFL, position yourself on the pocket line, right on the boundary fence. This guarantees you wont interfere with the players, umpires or ballboys... and it also gives you some protection when the players charge off the pitch.

Soccer
With Soccer, place yourself at least five metres behind the goal line, for the same reason as before with AFL. Again, make sure YOUR team is running towards you. Video work is best done at the centre line.

Rugby
Rugby League and Union you must be fit, because if you are not, you soon will be.
As the players pass the ball in a line moving across the field, you need to run and be with that line for the shots of the passes and tackles.
If the game is being televised, there will be a mobile camera held by one of the biggest and strongest blokes you have seen, and he WILL be running along the side line to capture the passes and tackles.
As such, you WILL work from a kneeling position so you will not interfere with his shots.
As these are winter sports, be prepared for the wet. Gummies and Old jeans because you will be walking through mud and kneeling in it.

Checklists;
Video;
Camera
tapes/ cards for the match
Batteries
tripod
mic
Stills Camera.
Camera with lens (400mm minimum for AFL. 300mm minimum for other codes)
storage cards
storage cards
Batteries.
Monopod
Monopod
Old jeans and gummies (because you will be kneeling down IN the mud)
General wet weather gear, such as Portabrace covers for the video cameras and plastic macs for the stills.
AUDIO for Video
If its a Grand Final and there is a commentary team there, (many community radio stations broadcast the game), then ask them if you can have an audio feed. Just make sure you include their names and station in the credits.
Either place a mic in the booth, or take a patch from their broadcast box. You will need either an XLR, RCA or 6.5mm adapter to plug in.
To connect, either run coax or better still, have a radio link from the booth to the camera.
If you are able to have selectable audio channels, then have one channel set to the booth, and the other to the on camera mic for the nats or natural ambient crowd noise.
Aaand, just make sure you monitor the audio feed using headphones.
--------------------------------------------------------------------------------------------------------------------


Now you have a whole new respect for the camera operators who work to capture the AFL, Soccer, Union or NRL games!
 |
| Me with my OLD DSR200 filluming the Grand Final at Tocumwal several years ago for WIN News and Echuca United.. A great camera, but let down only by poor low light performance. |
AUDIO for Video
If its a Grand Final and there is a commentary team there, (many community radio stations broadcast the game), then ask them if you can have an audio feed. Just make sure you include their names and station in the credits.
Either place a mic in the booth, or take a patch from their broadcast box. You will need either an XLR, RCA or 6.5mm adapter to plug in.
To connect, either run coax or better still, have a radio link from the booth to the camera.
If you are able to have selectable audio channels, then have one channel set to the booth, and the other to the on camera mic for the nats or natural ambient crowd noise.
Aaand, just make sure you monitor the audio feed using headphones.
--------------------------------------------------------------------------------------------------------------------
FILTERS
The use of filters in anything photographic
is one of the most overused and misunderstood techniques, says self confessed
filter hoarder Ben Longden.
The greatest shot ever made using a filter
is one that you don’t know a filter has been used.
That was what my mentor Con Diamond of the
Parkes’ Camera Club taught me nearly 30 years ago. To this day it remains true,
and applies to the use of filtration on camera as well as in post-production.
I would save my pennies to buy another roll
of Kodachrome slide film and pour over the latest Cokin filter catalogue at Diamonds Pharmacy, and
occasionally buy one. By the early 80s I
had around 30 filters, and would play with them all creating a myriad of shots
and effects that could not be replicated in a wet darkroom.
The only trouble I learnt was that if the
filter was used too many times, the audience would tire of it, and then so
would their hankering to see your latest creation.
The Tobacco sky filter was a favorite at
the time, but with CSI Miami now using
it to the point of meltdown, anything associated with the Tobacco filter is
simply deemed a tribute to the crime show.
Too much fake; The overuse of a tobacco filter
As the bags got heavier and heavier I
thought about preplanning the shot beforehand – and only taking marginally more
than was needed, especially when working solo and having to carry it all.
In the end I decided the most useful
filters to me would be
1)
the UV filter
2)
A Polariser and
3)
A Grey Graduated filter.
The Ultraviolet filter has no colouration.
It provides UV removal, which makes landscapes look a lot better but above all
it provided me with a cheap insurance policy.
It would be cheaper to replace that, than a
lens with a dirty scratch on the front element. A good deal when you consider
that with most video cameras the lens is part of the camera; which means the
camera becomes a paperweight once the lens is damaged.
The work camera with a 4x4 inch UV filter
The Polariser is useful for two
reasons. The first is that being neutral
in its colour, there will be no bias or colour shift as it reduces the incoming
light. The second is that it will remove
the unpolarised light from the image when rotated appropriately. You will be able to make a nice summer blue
sky into a rich deep blue sky.
With a polariser
The bottom line with this is you will have
two filters in one. A Neutral Density
(ND) and a polariser. The drawback in
using this is in low light or indoors.
There will be no advantage for you as there is no scattered light, and
being an ND, it will make you work two stops lower than you need to.
Having said that, there is the creative
potential for using one indoors to exacerbate the depth of field issues. (That
is another story altogether..)
The next one in my bag is a graduated
Neutral Density filter. As you can see, this starts off being opaque gray at
the top, and graduating to clear at about the halfway mark.
Cavisions polariser and grey graduated filters in their 4x4 inch glass range.
The primary use I have for this is to tame
bright skies. If the subject I need is
exposed correctly, and the sky blows out, then I use the grey grad to reduce
the effect. It is a subtle one that
makes it pleasant for the viewer to watch.
If the grey grad needs a boost, then out
comes the blue grad from its bag and this is used either with the grey or on
its own, depending on the situation.
In the examples shot for this article, the
grey grad used delicately tamed and darkened the sky, but
moving it too far down could ruin the image, turning the top thirds to black.
But then again, if that’s what you have in mind for a shot, then this is one
way to do it.
The grey grad tames a wild sky..
This has given the picture a photoshopped
look while being done ‘in-camera’.
The use of filters must be carefully done,
and with great care in moving shots. The
safest use is with the camera still, and the action moving in the frame – or
the shot gets ruined by things being filtered.
The use of grads works best on wide angle
shots, and to a lesser extent on tight zooms. They are at their most effective
on a land or city scape, and again, CSI Miami is the image that comes to mind.
Polarisers can be used at any focal length,
but again, they shine when used at the wide end of the zoom.
From practical experience, they are best
used when the camera is pointing away from the sun. if you set up the shot, face your own shadow
and stretch your arms out to the sides, the polarization effect works best in
that area, and with the sky as a dominant part of the image.
While the graduated filter is used
primarily to control sky highlights, it can be used upside down or at the sides
of the shot, depending on what the creative requirement for the shot is.
While I have mixed filters in this shot,
combining the polariser with the grey grad, there is no reason not to mix and
match, providing you get the result you are after. One image I shot of Ben Hall’s Grave (The bushranger),
for a festival in Forbes, took ten Cokin filters and was shot on Kodachrome
slide film. At the time a busload of
Japanese visitors arrived and they just took shots of this idiot lying on the
ground taking a shot of the grave.
This is the infamous ten cokin filter shot...
Mind you, the end result was brilliant,
projected onto the screen at the town hall, so it was worth the embarrassment.
With the advent of Photoshop in the early
1990s, it became mainstream for people to digitally tweak their images,
darkening the sky here and there, altering skin tone brightness and the such.
For the video user, it was only after the
serious adoption of the PC and high
speed data transfer all at a sensible price that correction in post production
could be done at home.
Opening most non linear edit software
packages (NLE’s) will reveal a plethora of transitions as well as filters. On top of this, software writers make plugins
available for sale over the net which increases the number you have available.
While this may sound great, don’t be fooled
by the marketing hype where they say it has 1001 transitions and 1002
filters. The truth is, you will use less
than a handful. It is what you do with
them that count.
For the closing title sequence of a wedding
I filmed at the beach, I had the couple
to the side, and while shooting I knew exactly what I wanted to do in post;
have a clear circle over them, and blur the rest of the image in radial lines.
My Cokin clear spot filter was at home. But
my NLE had the filter built in, and what’s more, I could be super specific
where it worked, and to the degree of effect.
This was an option not available in camera,
and being a wedding there is no such thing as a reshoot.
This brings us to another one of Ben’s rules with filters. Keep the original vision in pristine
condition.
And another; On location, work with the
polariser and grey grads to control the light, with the final one being ; Do
any other effect in post production unless you have the filter on hand and the
time available for numerous retakes– which usually is not that often.
---------------------------------------------
Polarisers
WARNING; SCIENCE CONTENT!
Light is not that simple. It behaves with
two characteristics, firstly that of a wave and also that of a particle.
For the discussion on polarization, we are
really interested in the wave properties light exhibits. A series of light
waves traveling in the same direction may not have the wave traveling in the
same plane. This is unpolarised light.
A polarizing filter allows only those waves
traveling in the same plane to pass through.
One example would be a gate made of horizontal
rails with a rope passing through. The rope could be flicked to produce waves,
but only those conforming to the gap in the rails would pass through.
A polarizing filter carries out this
operation, but at the wavelength of light.
An interesting effect occurs when two
polarizing filters are used. You effectively have a variable Neutral Density
filter.
(Source; Kansas State University,
University of Toronto)
About the filters
I use the Cokin A series on my small
handycam, and for stills work with the Nikons. These are capable of working on
lenses up to 62mm diameter.
On my work camera, I use the Cavision
professional filters, and these are made of optically flat glass, and are 10cm
square. As my camera is sensitive to the
red end of the spectrum, I have deliberately installed what’s known as a “Hot
Mirror” which filters out the infra red as well as the UV spectrum.
The end result for my camera is cleaner
colours especially reds and skin tones.
It simply looks like a slightly pink/purple
filter, but is optically neutral to visible light.
Some European cars have this same glass in
their windscreens, and is called Athermic glass, as it does not let the infra
red cook the interior.
However, the Cokin system will work with
small compact cameras without a filter thread up to video cameras with a 112mm
thread diameter.
These are broken up into eight categories
which include Colour and Technical- for colour temperature or white balance
correction, graduated, Neutral Density and UV, Polarisers, pastel diffusers and
soft focus filters, clear center spot, optical effects and special effect.
As if this was not confusing enough, the UV
filter can be also called a “skylight’ filter. While this is a UV filter, it
also has a slight pink tone, designed to warm up the image. Not only that but
it also comes with a slightly straw coloured variant, also designed to warm the
image. While the colour correction
filters were designed to compensate for white balance in stills work before the
digital era, they can also be used to alter the colour balance to suit the mood
the photographer wishes to portray.
While these colour moods can be done in
camera, consider doing them in post
production as well. The obvious downside
is the increase in rendering time.
With my ‘work’ camera, I have a Cavision
matte box fitted, which is especially designed to provide a controlled lens
shade and filter holder which takes the 4x4 (inch or 100mm square) optically
flat glass filters made by Cavision, Lee and others including Cokin.
The UV filter is permanently in place to
protect the very expensive objective lens of the camera, while the grad and
polar are in the backpack ready for use.
Further information; www.cokin.com
www.cavision.com
--------------------------------------------------------------------------------------------------


--------------------------------------------------------------------------------------------------
Got the shakes? You need a tripod.
Too much coffee.. too much caffeine.. not
enough sleep? All of these things will give you the shakes.. and the answer to
a steady image is not to quit cold turkey, but to take things easy.
Shaky vision is the curse of the video
camera, so much so that manufacturers have gone to great lengths to install
image stabilizing in their cameras, and software designers include it in their edit packages.
But these are not the miracle cure for shaky
camera work.
I always answer the question “when should I
use a tripod?” with “whenever you can!”. However, there are many occasions when
a tripod simply is not practicable. This then raises the issue of how to keep a
stable camera platform.
Most handycam users by default use the one
hand approach – that is, the camera in the right hand, with the viewfinder to
the eye, or the foldout screen flipped open, and the camera suspended in mid
air by the arm, with the forearm almost vertical.
While this position may seem comfortable
and logical, it also is the one most prone to unwanted camera movement – the
movements seen later on the lounge room telly. Movements include up and down,
tilting and panning, usually at a nauseous speed.
So, how to stop this is simple. Take a
breath and train yourself to keep the camera still and if it needs to move,
then do it slowly.
Easier said than done, so lets look at the
ways we can do this; Three legs (tripod) don’t apply to this story, so what
about the other extreme – one leg? A monopod, as they are called is a brilliant
and simple technique used by many newspaper stills camera operators to support
their long lenses. The 400mm that I use
for the footy weighs in at around six kilos. There is no way I can handhold
that for more than a couple of moments – as well as compose the shot. So I opt
for a single legged friend.
Using a monopod with motion pictures is not
a new technique, it was the standard fare during the 16mm cine days of news
gathering, and is now just coming back into vogue with TV news crews, typically
for the ‘B’ camera with the creative potential for ‘over the crowd’ shots.
Using the monopod is an acquired skill, but
not too remote from its three legged cousin.
Use the monopod to take the weight of the camera, but you provide the
other two legs to form a sort of composite tripod to provide stability. Place
your feet apart, so the ‘pod and feet form an equilateral triangle on the ground.
Use
the eyepiece viewfinder if possible, and have your right hand in the usual
grip. Place your left hand under the nose of the camera (to adjust focus). This
will give you maximum control over camera movement as well as the freedom to
become quickly mobile.
The next step is just two legs – your own.
Hold the camera with both hands, but lock
your elbows close to your sides. Have the eyepiece viewfinder up to your eye,
and you will have a full control of camera stability from the waist up. To
provide even more stability and control, have your feet placed apart – about
the width of your shoulders, and face the subject.
To tilt the camera, you simply use your
back, and if required, a bit of upward tilt with the hands. To pan, simply
rotate at the waist.
Having the camera on the ground, and able
to pan is a difficult scenario, and requires great patience and much rehearsal.
Eliminating unwanted movement is the key, as there is no such thing as “we can
fix it later..” in post production
One way to brace..
Of course, look around you. Is there
anything safe to brace yourself against, such as a doorway, railing and the
like. By using these immovable objects, you will be able to have even more
control over camera shake, especially in confined environments where a tripod
or monopod is impractical.
The Table Top tripod is worth its weight in
gold, and no its not a shrunken version of your bigger tripod.
This is especially designed to be strong,
durable and easily stored while holding the camera in position.
Such a small tripod need not be limited to
parking a camera on a table, but also for the ‘on the ground’ shots, as well as.. well almost anywhere. The advantage is that you will be able to
compose the shot and know the camera
will stay aligned with your plans. Another advantage is they can be stowed in a
small camera bag without chewing up too much room.
One word of caution, in these days where airport
security deems nasal hair tweezers as a lethal weapon, it might be best to not
have it on you or in your airport carry-on luggage.
Rock solid vision; on a tripod.
------------------------------------------------------------------------------------------------------
Don't believe everything you see.
Thats right. This is about the perils of believing an image is what was there in front of the camera...
Remember the good days before Photoshop? You could dodge and burn to lighten and darken pictures and tweak the contrast and that was about it.
A photo was a truthful representation of what was there in front of the camera. Well. not anymore.
This is an example of what can be done.
The backstory is that I filmed the Elmore Deb ball, and needed a Photo of St Josephs church to include in the opening titles.
I only had the phone with me (16Mp) and it was a flat day;

BUT. I wanted it punchier, with some dramatic mood lighting like a sunbeam on the wall, and a brooding stormy sky above... Something that would look not too fake for about 1.5 seconds on screen.

Literally ten mins later, I had this done.
Seeing ain't believing.
IF this was for publication, I would have to put a rider in the caption "Digitally Altered Image"
But its for one and a half seconds on a TV screen, and in amongst other images that have also been modified.
Yes its an "arty" photo, and to many people that aspect justifies the "look at my photo" privelidge. Well... in every news publication, whats printed has to be an accurate and faithful representation of what was there before the camera. Art magazines, well, anything goes.
With photoshop it was a case of lassooing areas with a 50 pixel feather, and just using the greypoint in levels, contrast and brightness.
No comments:
Post a Comment